VS CODE EXTENSION
Data Visualization Debugger

Visualizing data structure modifications utilizing the debugging view provides a very precise picture of exactly what happens with each operation. This article covers the visual debugger through an exploration of the following examples:
- Line Graph plotting — Typescript
- Linked List plotting — C# Console Application
Before starting, let’s look at how to access Visual Debugger
First, get the following extension from the marketplace and install it into Visual Studio Code:
https://marketplace.visualstudio.com/items?itemName=hediet.debug-visualizer
- Run any code in debug mode
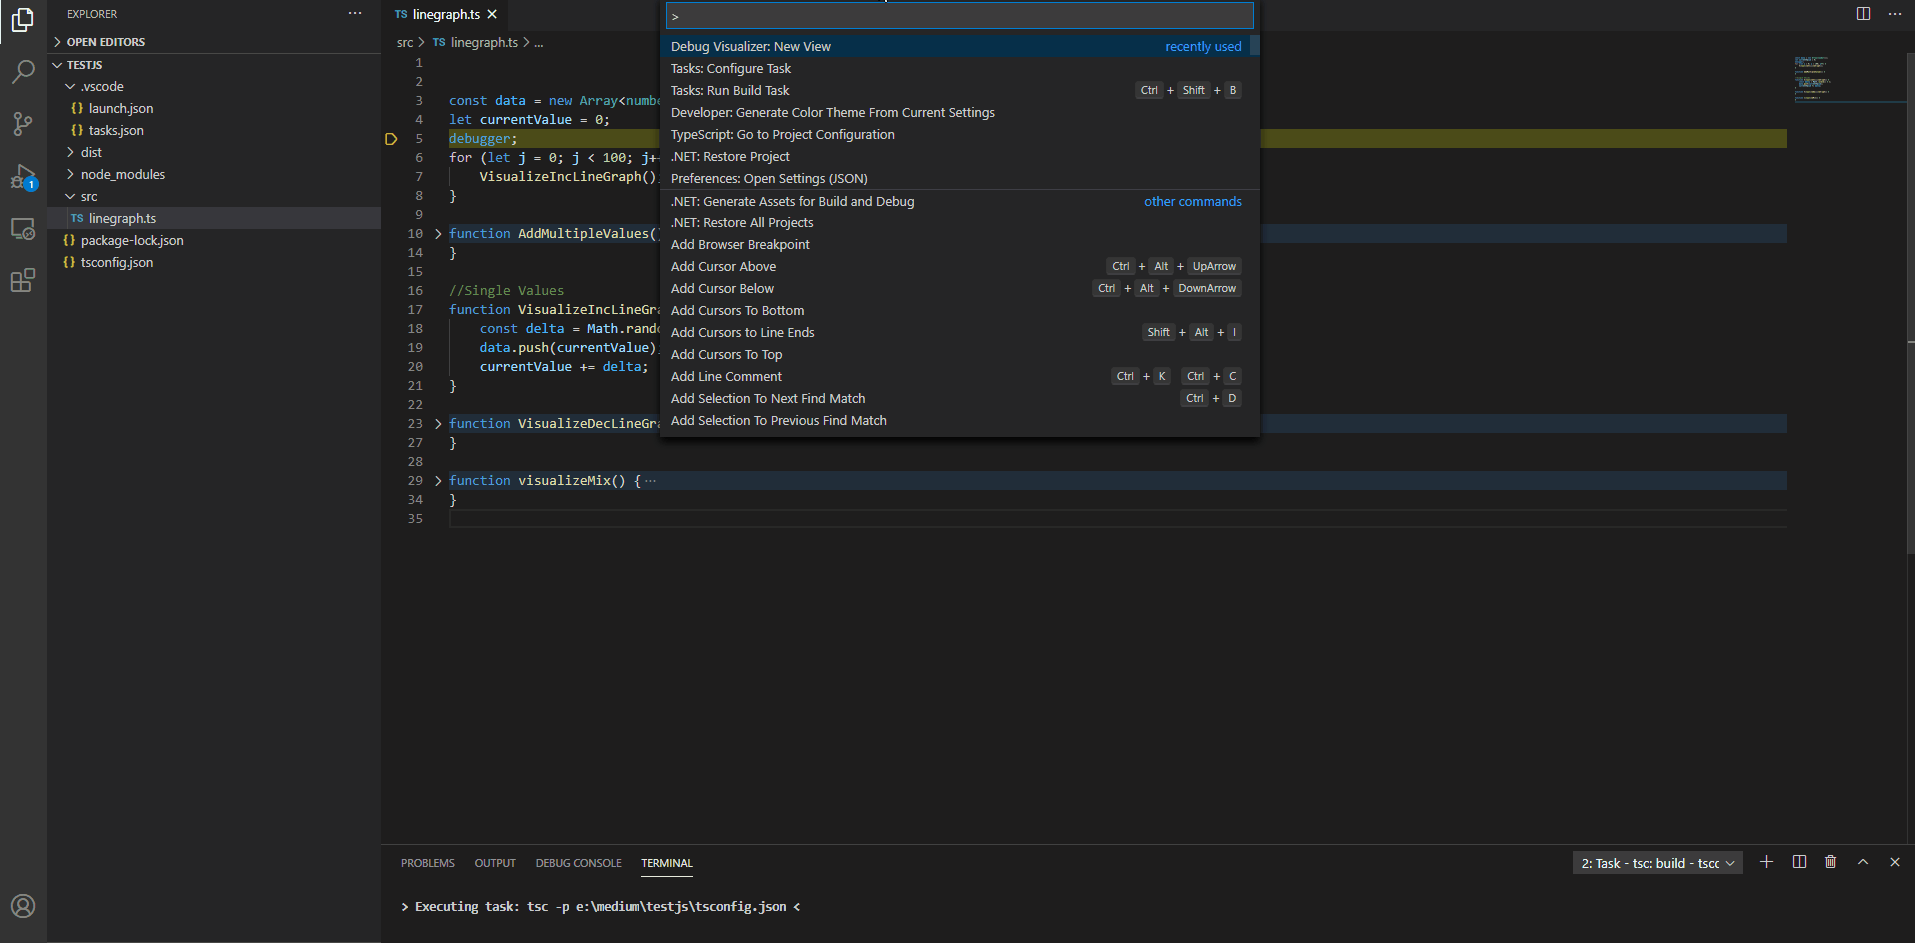
- Press “Ctrl + Shift + P” to open command palette
- Search for Debug Visualizer
Visualize Line Graph with Typescript
- Create a folder and basic typescript project configurations. Refer to the GitHub sample attached at the end for more information.
- Please install the below package using the following NPM command:
npm install --save @hediet/debug-visualizer-data-extraction
Imagine the following visualization on the variable value change:
Let’s write some code.
We will plot four different types of line graphs using Typescript.
Please note: For typescript launch settings, “Node.js debugger” is used. To test, simply open the file that needs to be debugged. Remember to add a “debugger;” statement to begin debugging.
Single value plotting
- Positive Line graph, i.e., the variable value plotted always increases.
- Negative Line graph, i.e., the variable value plotted always decreases.
- Plot a mix of positive & negative values in the line graph.
Multiple value plotting
- Adding more than one value into the line graph at the same time.
Positive Line Graph
The following code example adds a random value into the array of numbers. To better visualize this, the random value is multiplied by two.
const data = new Array<number>();
let currentValue = 0;
debugger;
for (let j = 0; j < 100; j++) {
    VisualizeIncLineGraph();
}
//Single Values
function VisualizeIncLineGraph() {
    const delta = Math.random() * 2;
    data.push(currentValue);
    currentValue += delta;
}
Open the “Debug Visualizer” and watch on a “data” variable inside the debug visualizer input. Please look at the following instructions to get an understanding of how to visualize this.
Negative Line Graph
The code example below adds a “random negative value” into the array of numbers. To better visualize this, the random value is multiplied by two.
function VisualizeDecLineGraph() {
    const delta = -Math.random() * 2;
    data.push(currentValue);
    currentValue += delta;
}
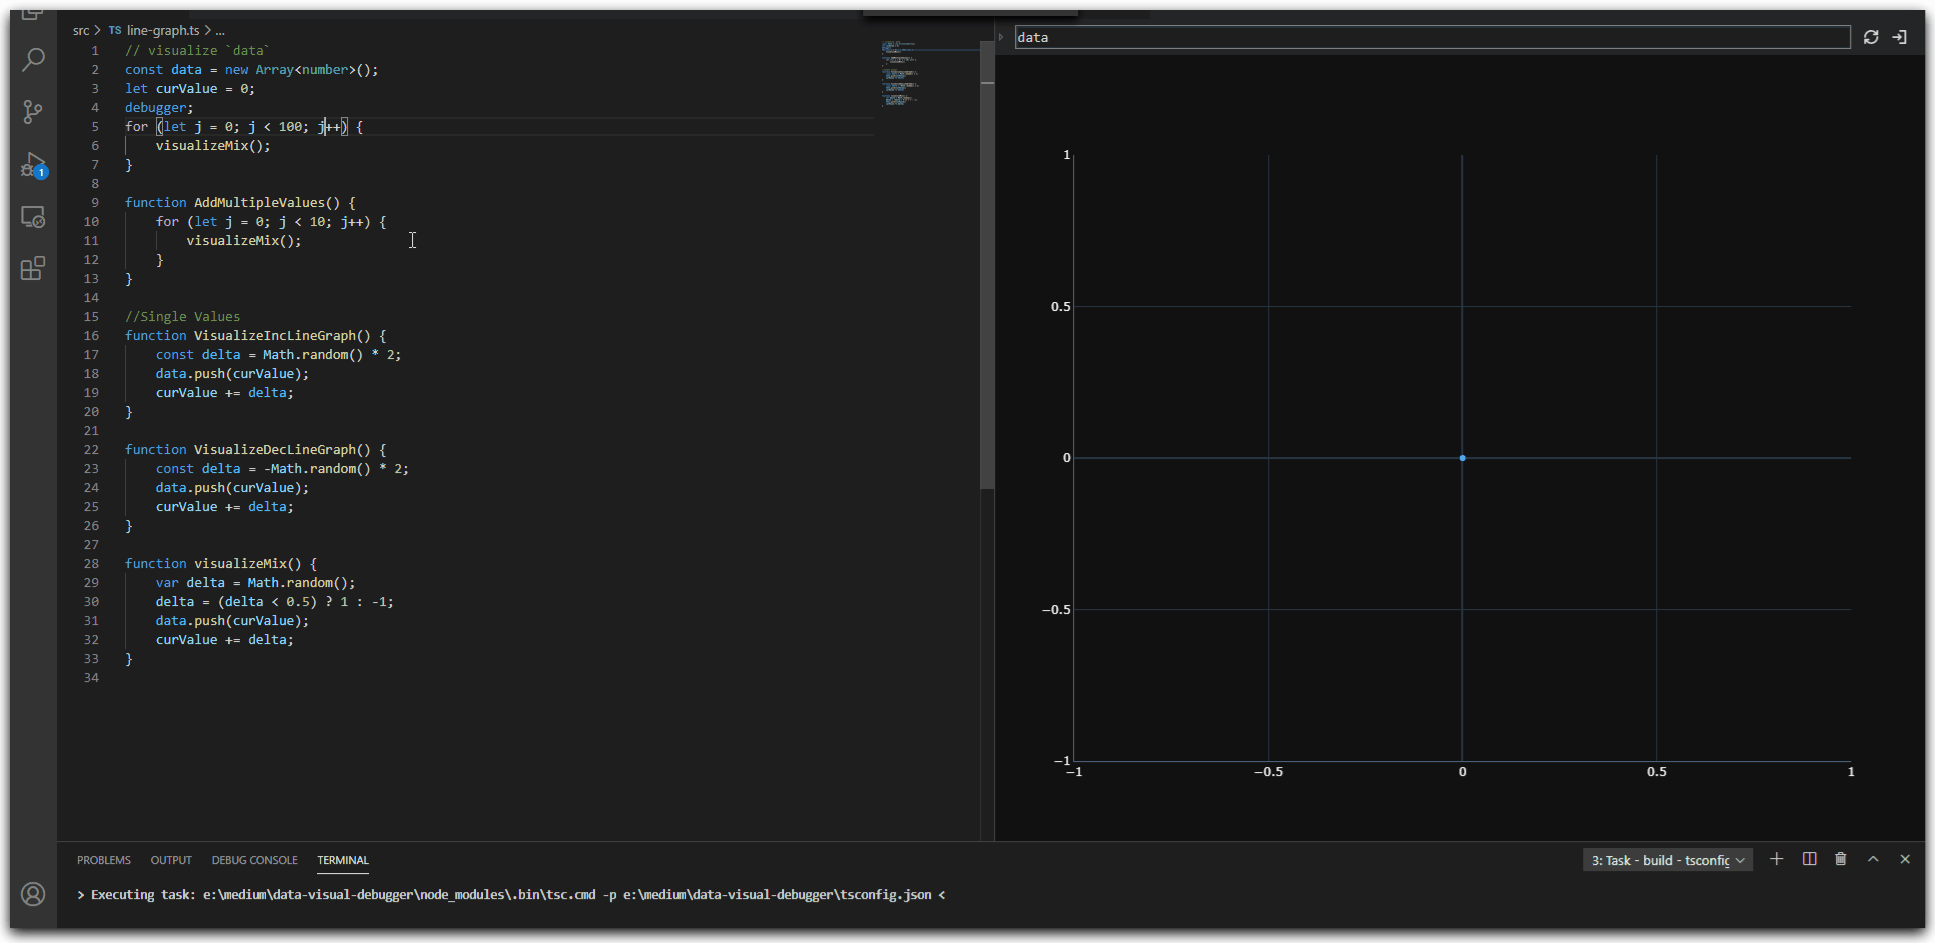
Plotting mix of positive and negative values
The following code example adds “random values” into the array of numbers. To better visualize this, conditionally check the random value to mix both positive and negative values.
function visualizeMix() {
    var delta = Math.random();
    delta = (delta < 0.5) ? 1 : -1;
    data.push(currentValue);
    currentValue += delta;
}
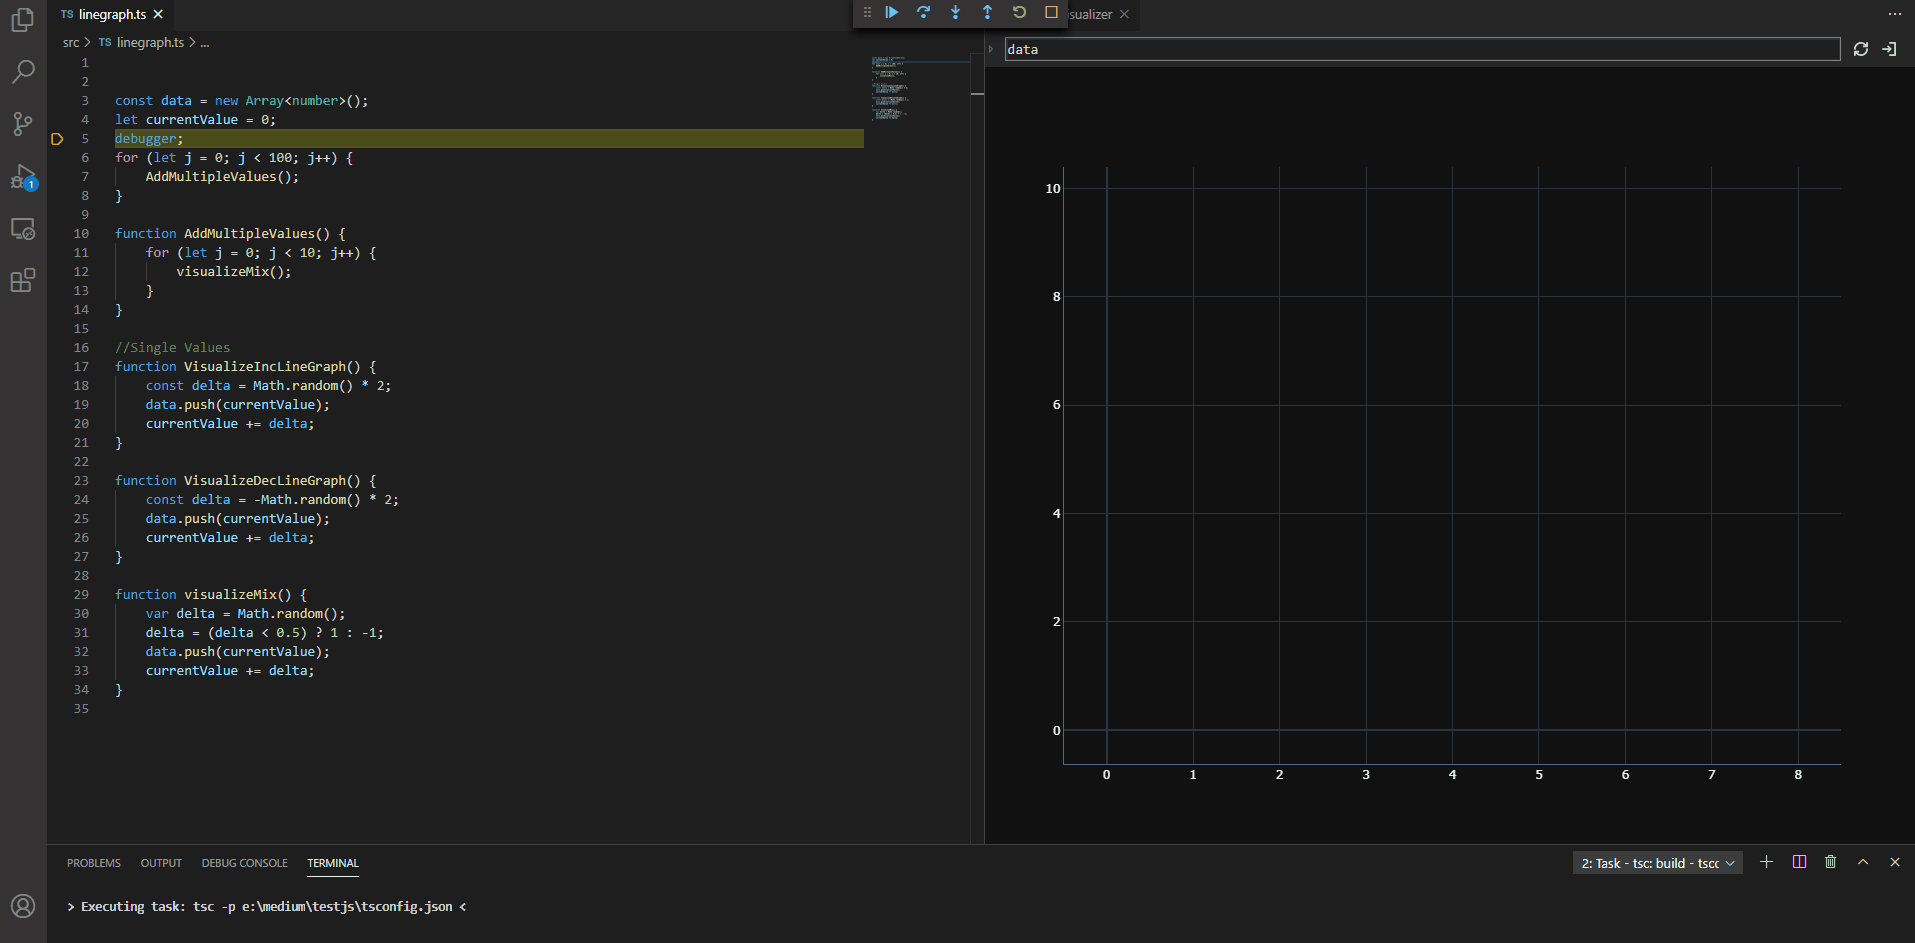
Multiple Value Plotting
The trick is to write a nested loop with the “visualizeMix” method.
const data = new Array<number>();
let currentValue = 0;
debugger;
for (let j = 0; j < 100; j++) {
    VisualizeIncLineGraph();
}
function AddMultipleValues() {
    for (let j = 0; j < 10; j++) {
        visualizeMix();
    }
}
function visualizeMix() {
    var delta = Math.random();
    delta = (delta < 0.5) ? 1 : -1;
    data.push(currentValue);
    currentValue += delta;
}
Visualize
Complete Code
Please find the complete code below and modify the function call according to the plotting:
const data = new Array<number>();
let currentValue = 0;
debugger;
for (let j = 0; j < 100; j++) {
    AddMultipleValues();
}
function AddMultipleValues() {
    for (let j = 0; j < 10; j++) {
        visualizeMix();
    }
}
//Single Values
function VisualizeIncLineGraph() {
    const delta = Math.random() * 2;
    data.push(currentValue);
    currentValue += delta;
}
function VisualizeDecLineGraph() {
    const delta = -Math.random() * 2;
    data.push(currentValue);
    currentValue += delta;
}
function visualizeMix() {
    var delta = Math.random();
    delta = (delta < 0.5) ? 1 : -1;
    data.push(currentValue);
    currentValue += delta;
}
Visualize Linked List with C#
Create a simple .Net Core console application using the below command (assuming .Net Core SDK is already installed).
dotnet new console -o <ProjectName>
Let’s write some code for single linked list operations like append.
https://gist.github.com/ssukhpinder/19bf7f8fb7e48f237509349e48798c19
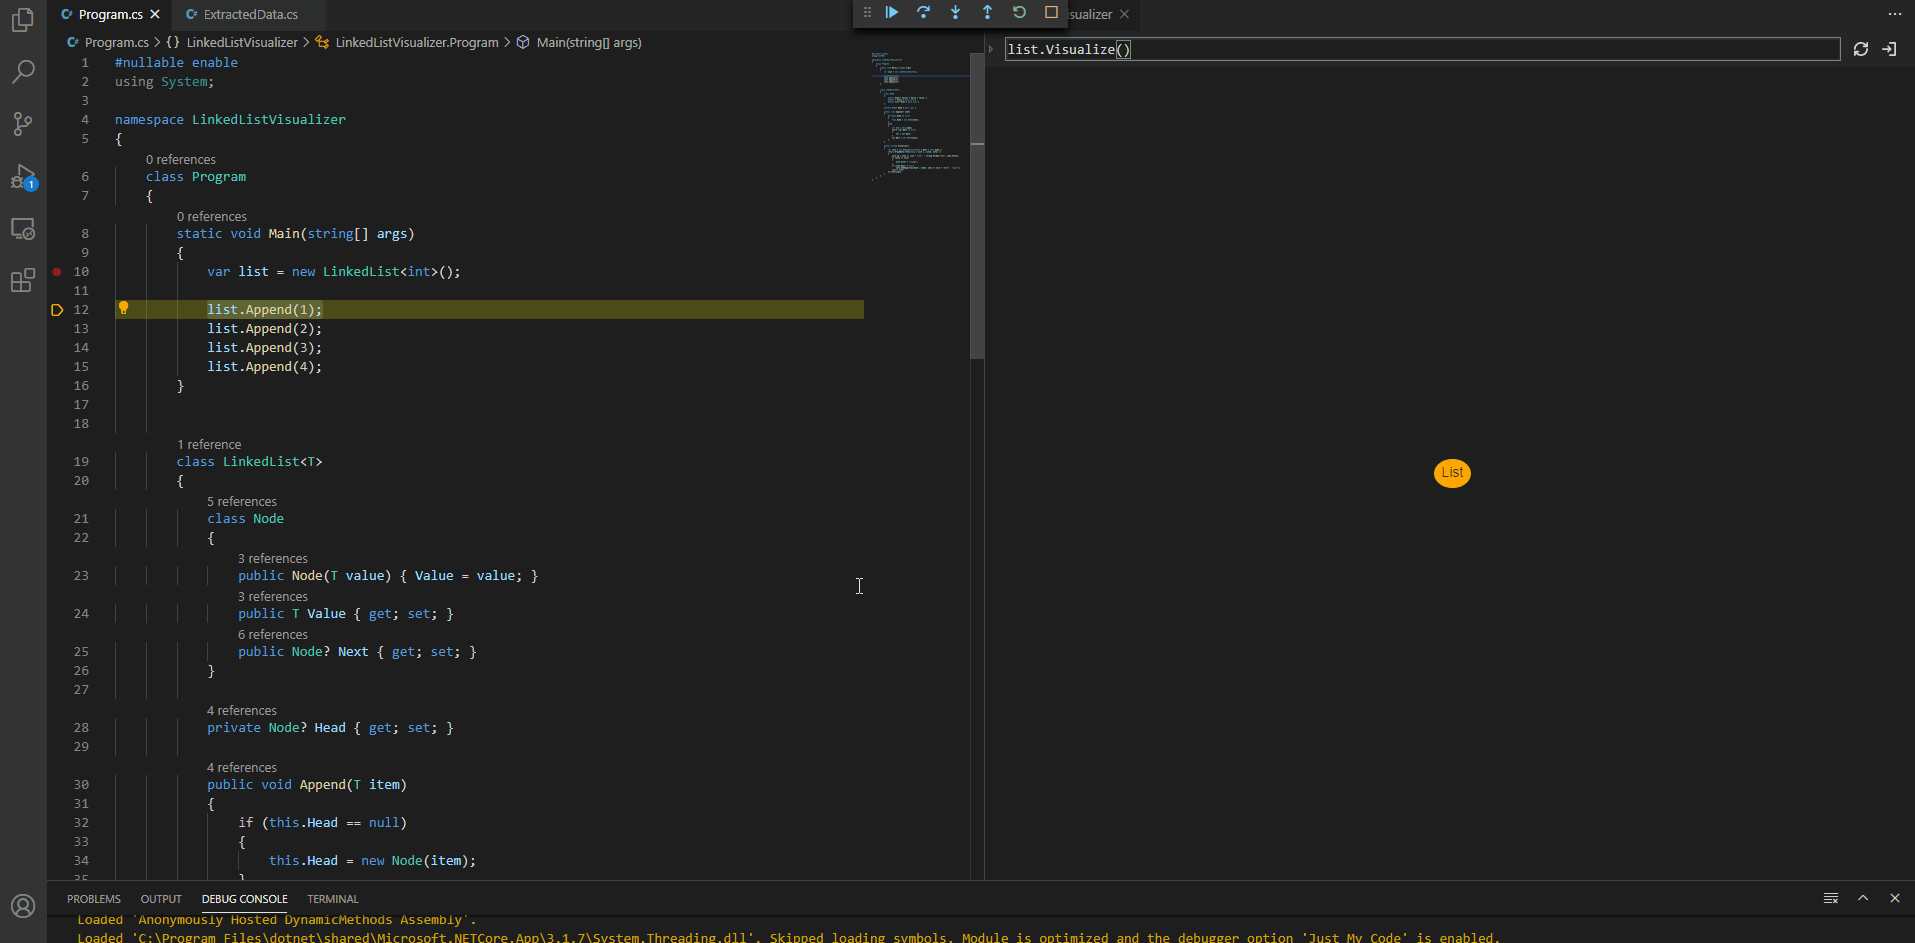
Corresponding call from the main method to append four nodes into the LinkedList with values 1,2,3 and 4, which can be visualized as such:
var list = new LinkedList<int>();
list.Append(1);
list.Append(2);
list.Append(3);
list.Append(4);
Now let’s add the visualization function.
Now with each linked list append operation, a visualizer node will be created and shown below:
https://gist.github.com/ssukhpinder/01c96e45fa6006b37c9e5037cf6d6dba
Visualize
Notice that with each append operation, a node is added into the visualizer as well.
Conclusion
There you have it, a way to visualize data structures in debug mode! By taking the time to put the above walkthrough into action, you’ll greatly increase your ability to view the details and nuances of each operation. I hope you found this article helpful, please let me know your thoughts in the comments section.
Resources
Github Samples
C# Linked List sample project
https://marketplace.visualstudio.com/items?itemName=hediet.debug-visualizer
Typescript line graph project
https://marketplace.visualstudio.com/items?itemName=hediet.debug-visualizer
Learn about C# or Kubernetes
https://marketplace.visualstudio.com/items?itemName=hediet.debug-visualizerhttps://marketplace.visualstudio.com/items?itemName=hediet.debug-visualizerhttps://marketplace.visualstudio.com/items?itemName=hediet.debug-visualizer
